Blob storage connections
Connect your cluster to a bucket/container so Quix can enable Quix Lake or any other managed service that requires a Blob storage connection.
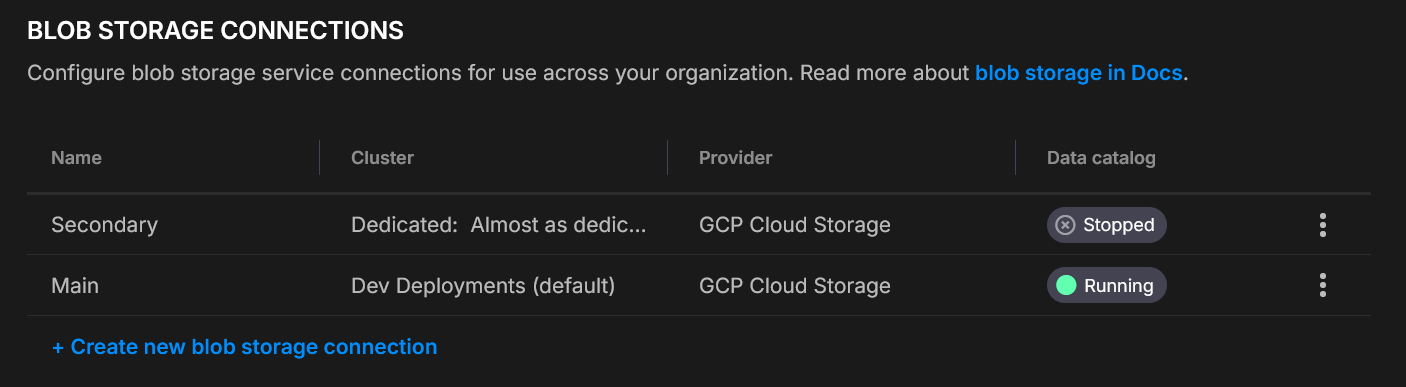
One connection per cluster
Each cluster supports one blob storage connection.
You can configure different connections for different clusters.
Quix Lake at a glance
Summary - Quix Lake persists Kafka topic data as Avro/Parquet in your own bucket (S3, GCS, Azure Blob, MinIO), partitioned for fast discovery and full-fidelity Replay.
Why it exists - Preserve exact Kafka messages (timestamps, headers, partitions, offsets, gaps) with indexed metadata so API, Replay, Sinks, and future services operate on open formats you control.
Key properties - Portable - open Avro & Parquet - Efficient - Hive-style partitions + Parquet metadata - Flexible - historical + live workflows - Replay - preserves order, partitions, timestamps, headers, gaps
Flow - Ingest (Avro) → Index (Parquet metadata) → Discover (Data Lake API & Metadata API) → Replay (full fidelity back to Kafka) → Use (explore, combine historical + live, run queries/export).
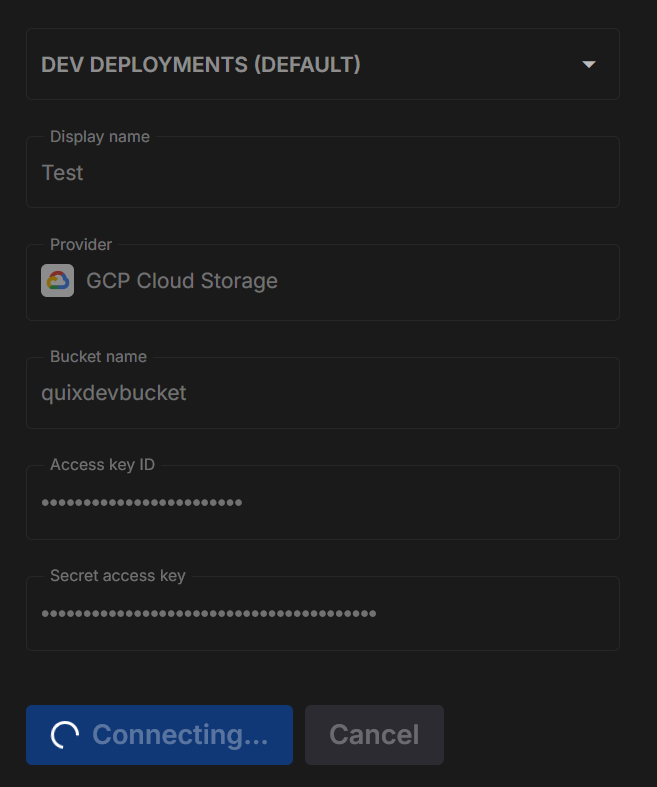
Create a connection
- Settings → Blob storage connections → Create
- Pick Cluster, set Display name, choose Provider, fill the fields
- Test connection (below)
- Save
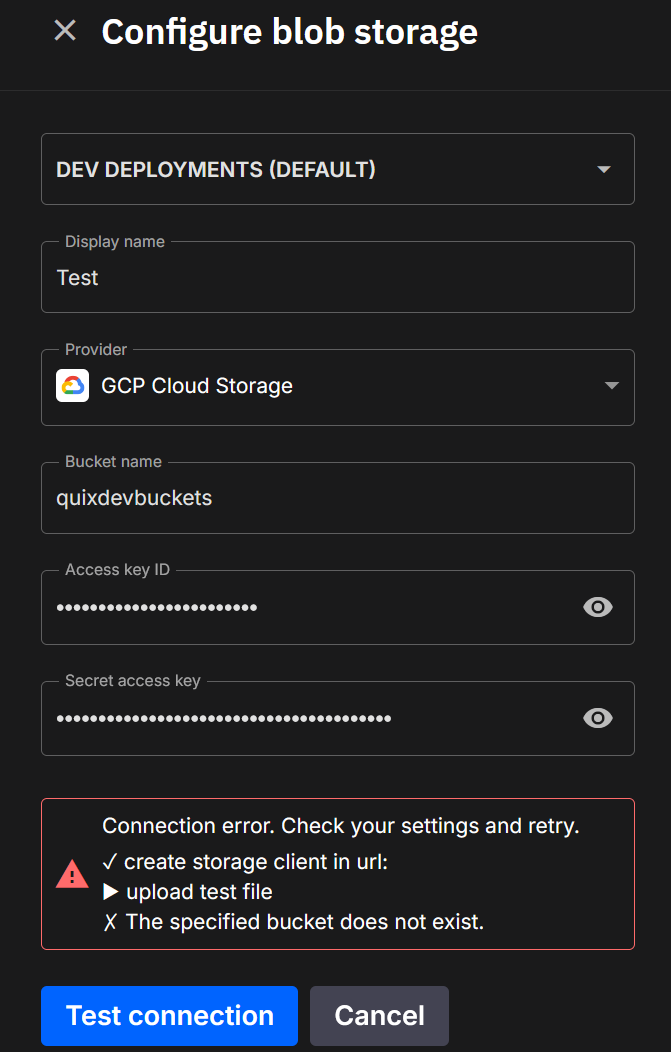
Test before saving
When you click Test connection, Quix runs a short round-trip check to make sure your details are correct and that the platform can both see and use your storage.
Here’s what happens:
- Connect - Quix creates a storage client using the details you entered.
- Upload - it writes a small temporary file into a
tmp/folder in your bucket or container. - Check visibility - it confirms the file shows up in the storage listing.
- Query - it runs a simple check to ensure the file is discoverable for later Quix Lake operations.
- Clean up - the temporary file is deleted so your storage stays tidy.
Success
Each step is shown in the dialog. Successful steps are marked with a ✓, and you’ll see confirmation when everything checks out.
Failure
If a step fails, you’ll see ✗ next to it along with the reason (for example, “Access denied” or “Wrong region”). This makes it easy to fix permissions or update your settings.
Providers
- Log in to the AWS Management Console.
- Go to IAM.
- Open Users.
- Select an existing user or click Add user to create a new one.
- Permissions
- In the Permissions tab, attach a policy that allows bucket access.
- Security credentials
- Open the Security credentials tab.
- Click Create access key.
- Save credentials
- Copy the Access Key ID and Secret Access Key (the secret appears only once).
- Copy the information into the Quix S3 form.
- Click Test Connection.
- Ensure access
- Have Google Cloud project owner or similar permissions where your bucket resides or will be created.
- Create a service account and assign it to the bucket with R/W (e.g.,
roles/storage.objectAdmin) or equivalent minimal object roles. - Open Cloud Storage settings
- In the Google Cloud Console, go to Storage → Settings.
- Interoperability tab
- Select Interoperability.
- If disabled, click Enable S3 interoperability.
- Create (or view) keys
- Under Access keys for service accounts, click Create key and follow the process to assign one to the service account.
- Save credentials
- Copy the Access key and Secret (the secret is shown only once).
- Paste this information into the Quix S3 connector form.
- Click Test Connection.
- Ensure access
- Your Azure user must have at least the Storage Blob Data Contributor role (or higher).
- Open the Azure Portal and go to your Storage account.
- Navigate to credentials
- In the left menu, expand Security + networking.
- Click Access keys.
- Copy credentials
- Note the Storage account name.
- Copy Key1 (or Key2) value.
- Paste the information into the Quix Azure Blob connector form.
- Click Test Connection.
- Ensure access
- Your MinIO user or role must include permissions to create and list access keys (e.g.,
consoleAdminor a custom PBAC policy). - Log in to the MinIO Console.
- Go to Access keys
- Select Access keys in the left menu.
- Create a new key
- Click Create access key to generate an Access Key and Secret Key.
- Save credentials
- Copy the Access Key and Secret Key - the secret is shown only once.
- Copy the information into the Quix MinIO connector form.
- Click Test Connection.
Security & operations
- Dedicated principals per connection (IAM user / Service Account / MinIO user)
- Scope credentials to one bucket/container
- Rotate keys regularly; store secrets securely
- Consider server-side encryption and access logging
See more
- What is Quix Lake - what it is and why it exists
- Open format - layout and schemas (Avro, Parquet)
- Quix Lake - API - browse, search, and manage datasets
- Quix Lake - Sink - persist topics to your bucket/container
- Quix Lake - Replay - re-run datasets back to Kafka