Deploy an External Image
This section of the documentation provides guidance on how to deploy an external image within the pipeline.
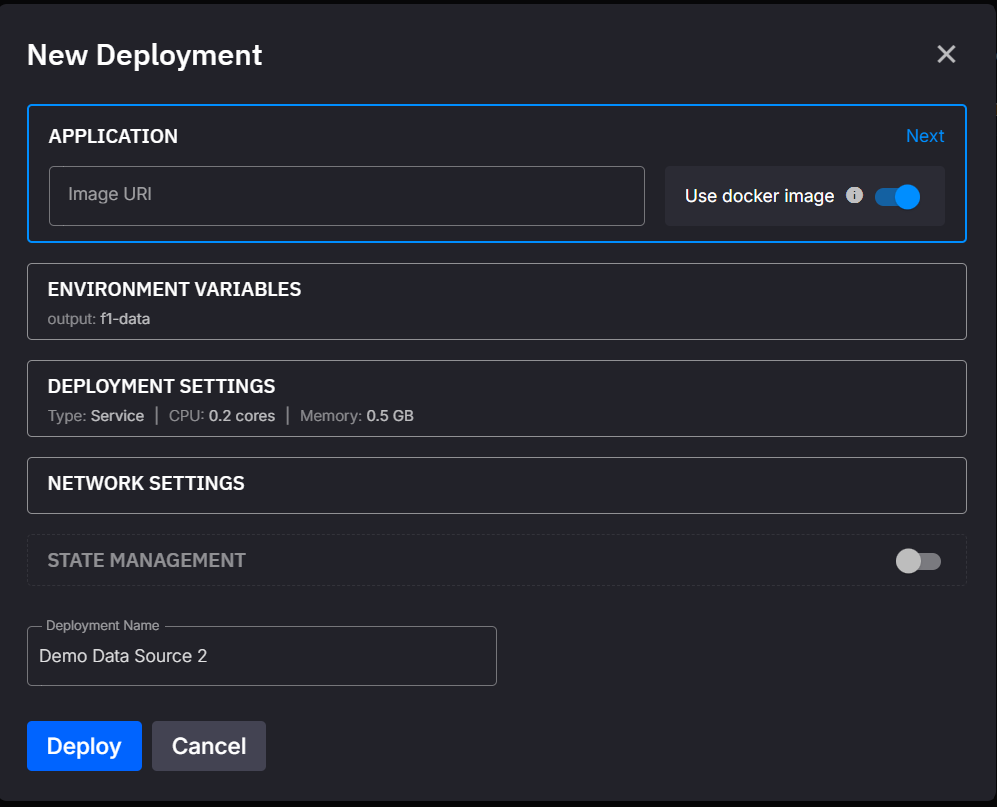
Deploying an external image directly allows you to bypass application and version configurations, offering flexibility for non-standardized services or third-party containers. The deployment process is straightforward and integrated into the UI.
To summarize, the steps for deploying an external image are:
-
Prepare the external image: Ensure it's built and pushed to a container registry accessible by the platform.
-
Access the
New deploymentdialog in the UI: Select the option to deploy an external image from the menu.
- Provide the external image uri and configure settings: In the dialog, specify the image and adjust settings like resources, replicas, and public access.
External Image Reference
The external image reference specifies the image to deploy. It must include:
- The container registry (e.g., DockerHub, AWS ECR, GCR).
- The image name.
- The tag (e.g.,
latest, or a specific version like1.2.3).
Example external image reference:
Deployment Settings for External Images
The deployment settings for external images are similar to application deployments, with slight differences. Below is a description of the main features:
| Dialog Item | Description |
|---|---|
| External Image | The full external image reference, including registry, name, and tag. |
| Environment Variables | Any environment variables your container needs can be specified here. |
| Deployment Settings | Configure whether the image runs as a service or a job. Also, set CPU, memory, and replicas for scaling. |
| Public Access | Configure whether the container is accessible externally via a public URL. |
| State Management | If state is enabled, a state folder is created to persist data across restarts. See state management docs. |
| Deployment Name | The name of the deployment. You can change it to something descriptive. |
Working on the Command Line
To deploy an external image from the command line, modify your quix.yaml file to include the image.
Example:
- name: custom-service
    image: my-registry.com/my-service:1.2.3
    deploymentType: Service
    resources:
      cpu: 300
      memory: 600
      replicas: 2
    desiredStatus: Running
Then use the following commands:
- Sync local changes: Use the
quix local pipeline sync --updatecommand. This updates your pipeline in Quix Cloud based on yourquix.yamlfile. - Sync remote environment: Use the
quix envs synccommand to synchronize an environment with its project repository.
For more details on CLI usage, see the CLI documentation.
Private Container Registries
If the external image you wish to deploy is hosted in a private container registry, check out this page to learn how to configure it.


.png)