Deployments overview
This section of the documentation covers how to deploy, observe, and scale your application.
An application can be deployed as a service or job. A service runs continually, a job runs just once and then terminates.
To recap, your typical workflow is:
- Create a project (a Git repo).
- Create an environment (a branch, with broker options).
- Develop your application code.
- Deploy your application (as a service or job).
When you deploy your application, you use the New Deployment dialog.
Deployment version
The version of the code you are going to deploy. You can use the latest version available in the branch, or you can select a pinned version. Using the latest version makes sure you always use the most recently committed code in the service. A pinned version is usually one you have created a specific tag for, or it could be a specific commit. You can select the pinned version you want from the dropdown. The version tag needs to be unique for the project.
If you're using the latest version of the code you'll see Latest displayed in the corresponding service panel:
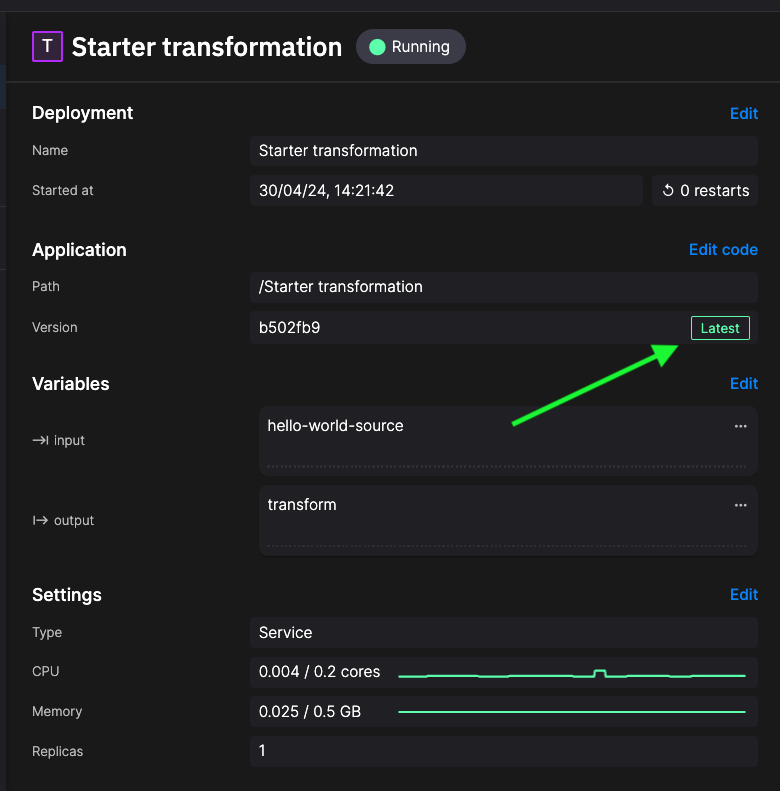
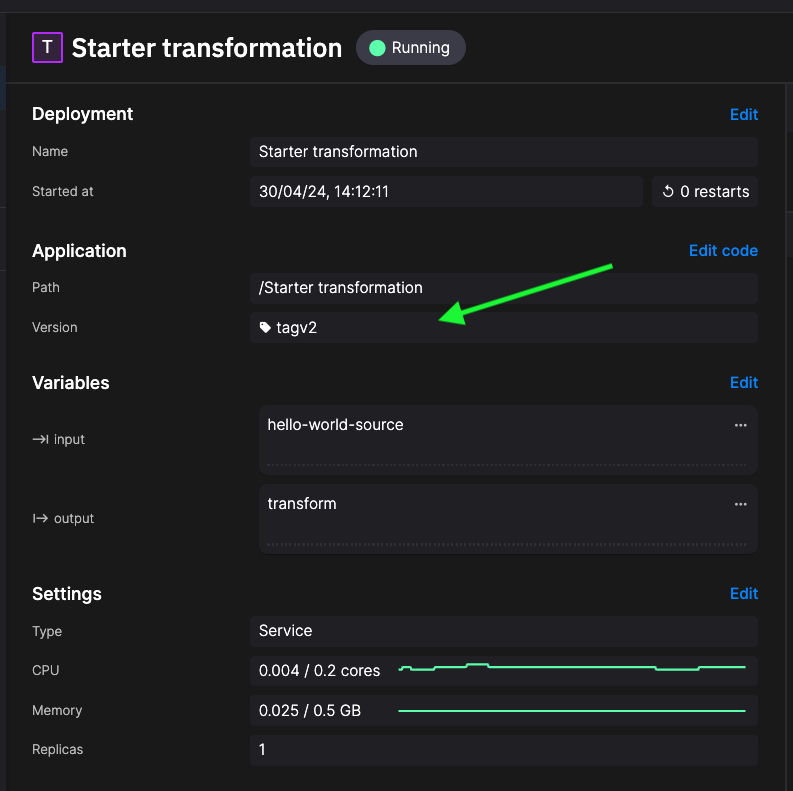
If you're using a pinned (tagged or specified commit) you'll see the tag or commit number as appropriate:
Tip
If you modify the code for a deployment and commit it, then the system recognizes that your pipeline is out of sync with the code in the project, and you are prompted to sync your environment.

However, this deploys the service with the new code immediately, which might not be what you want. If you want to continue editing your code, simply ignore the sync request, edit your code, then redeploy to either the latest version or a pinned version as required. The sync environment prompt will disappear at this point, as your project is now synchronized, that is the pipeline is running the version of code you specified.
Deployment settings
The main features are described in the following table:
| Dialog Item | Description |
|---|---|
| Application | You can select the name of the application you are deploying from here. |
| Version | The version of the code you are going to deploy. See deployment version for further details. |
| Environment variables | Any environment variables your application uses are shown here. Bind a variable to a project variable to vary its value per environment or to inject a secret. |
| Deployment type | Here you can select whether you want the application to run as a job or a service. |
| Deployment resources | Here you set the CPU and memory for each replica and, except for jobs, the number of replicas. When your organization has deployment sizes enabled, you can pick a size from its catalog. Choosing resources in the deployment dialog explains when you can also set the values directly and when you can reserve a share of them. More than one replica gives you some horizontal scaling. A replica is an instance of the application running. If the deployment has more replicas than an input topic has partitions, the dialog shows a warning icon next to Replicas whose tooltip reads The input topic <topic> has <partitions> partitions. Some of the replicas will not receive data. |
| Public access | This is where you want to make the application accessible to the Internet. For example, if the service implements a UI it will usually be available through the web. |
| State management | If you enable state, your application can preserve state between restarts. A state folder is created that is used for data structures and files you want to preserve in the event of service crashes or restarts. See also the docs on state management. |
| Deployment name | You can change the name of the deployment. |
Redeploying a service
If you subsequently edit your service code (application) and then click Redeploy, you are presented with the Edit deployment dialog. The same options previously mentioned are displayed in the dialog. Change the deployment settings as required (perhaps to pick a larger deployment size, or use the latest or a pinned version of the code), and then click Redeploy.
Logs
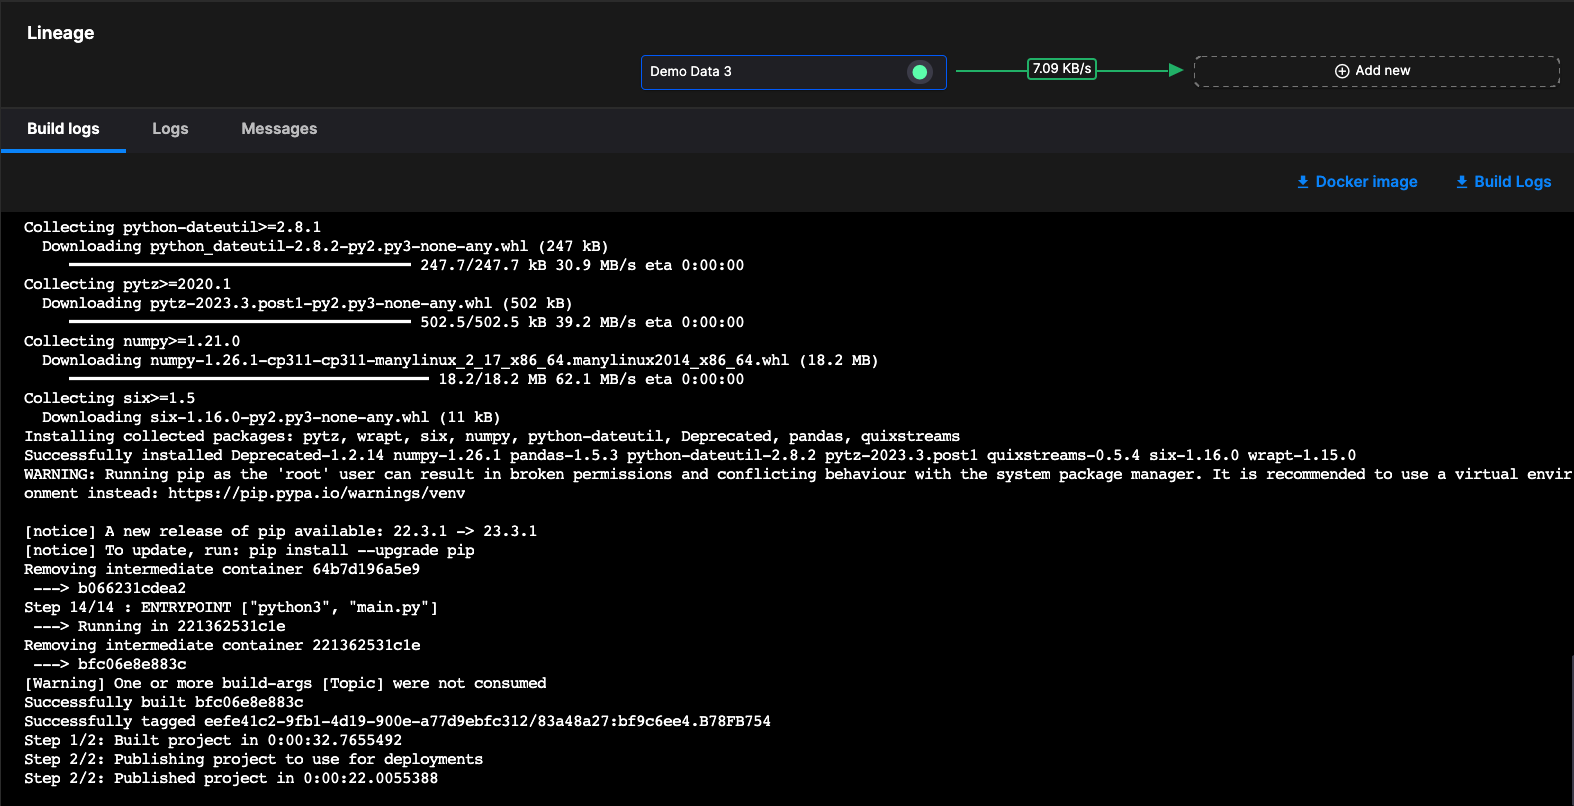
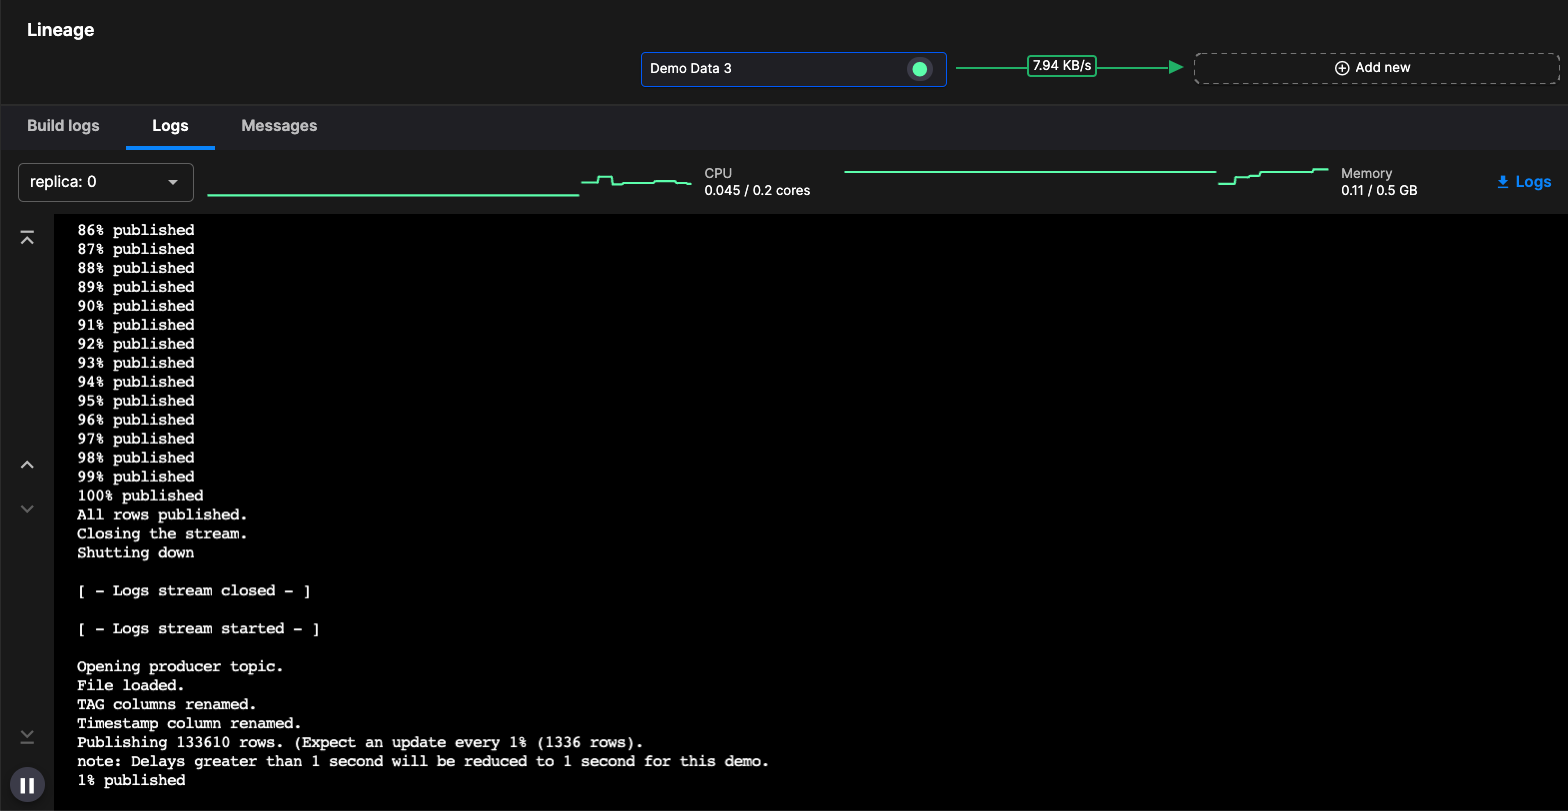
Each deployment has a logs panel that surfaces both build-time and run-time output, so you can observe and debug the service or job without leaving the portal.
When you build a deployment, build logs are available on the deployment page. Any compile or container build errors are surfaced here, and the logs can be downloaded for offline viewing.
At run time, the same panel switches to live service / job logs — useful for following start-up, watching for runtime errors, or confirming that a deployment is processing messages as expected.
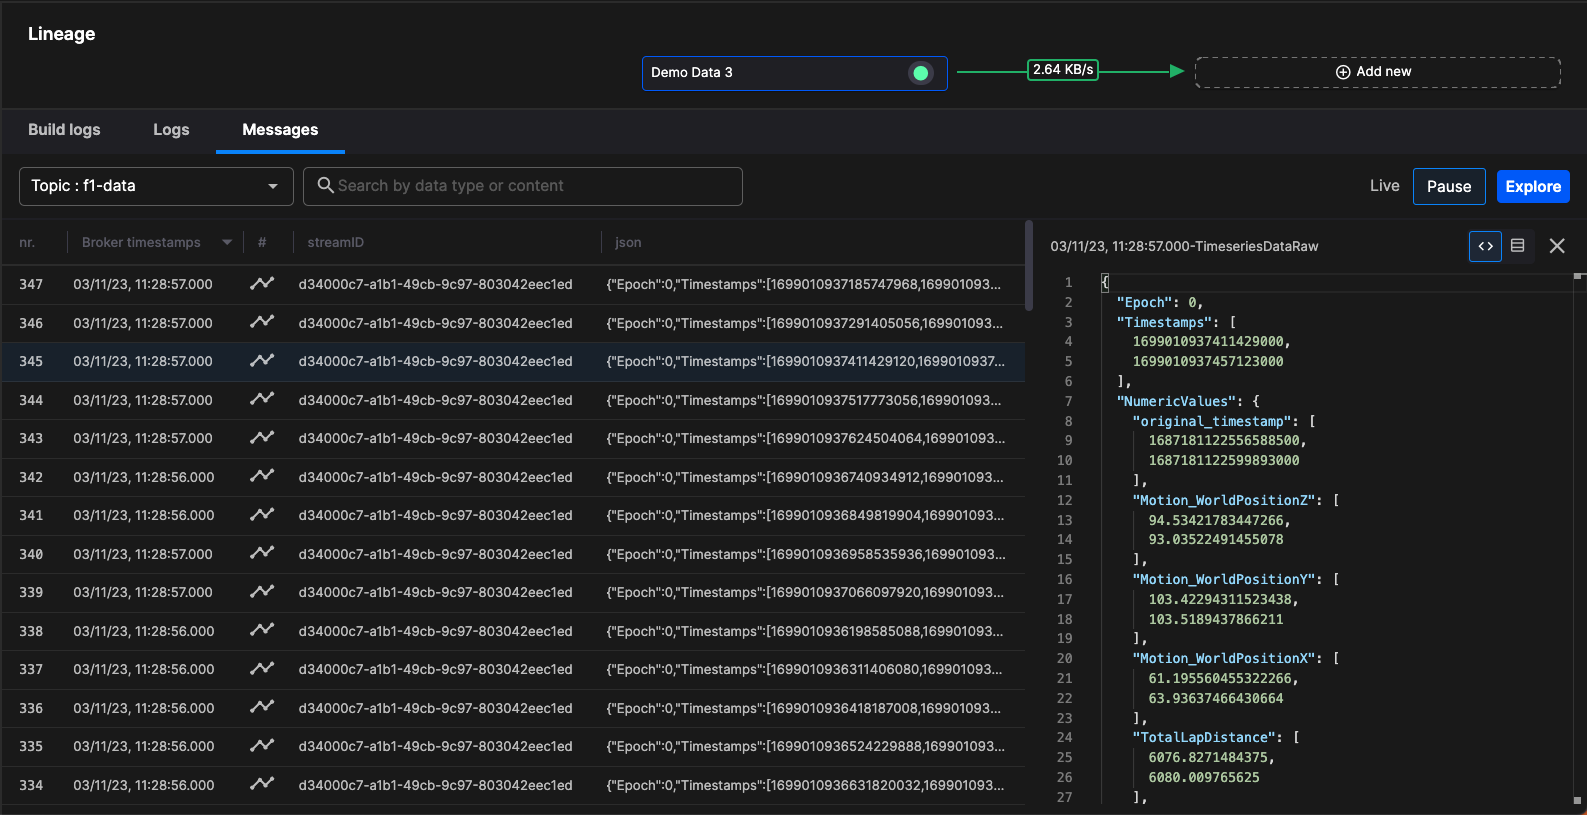
Message viewer
Next to the Build logs and Logs tabs is the Message viewer, which shows the raw messages flowing through the deployment's input and output topics. Use it to confirm that data is reaching the deployment, or to inspect the payload shape your code is actually receiving.
Working on the command line
If you are working on the command line and want to deploy local applications, you can use the quix local pipeline sync --update command. This modifies your quix.yaml file, pushes locally modified code to your project repository, and synchronizes with Quix Cloud.
This command also prompts you to include other applications that need to be synched if required. The deployments use the settings specified in the deployments section of the project's quix.yaml file.
To sync a remote (cloud-based) environment to its project repository, you can use the quix envs sync command. This syncs the environment in the current (default) selected context with its project repository.
See the CLI documentation for more about working on the command line.
.png)