How to create a project from a template in Quix
Learn how to get started quickly with Quix project templates and use them as a reference to build your own event-driven, stream-processing application.
What are project templates?
Project templates are fully functioning event-driven applications that you can use to figure out what is possible with Quix, how Quix works, and how to start building your own projects.
To actually customize a project template for your own purposes, you first need to clone it.
Get started quickly
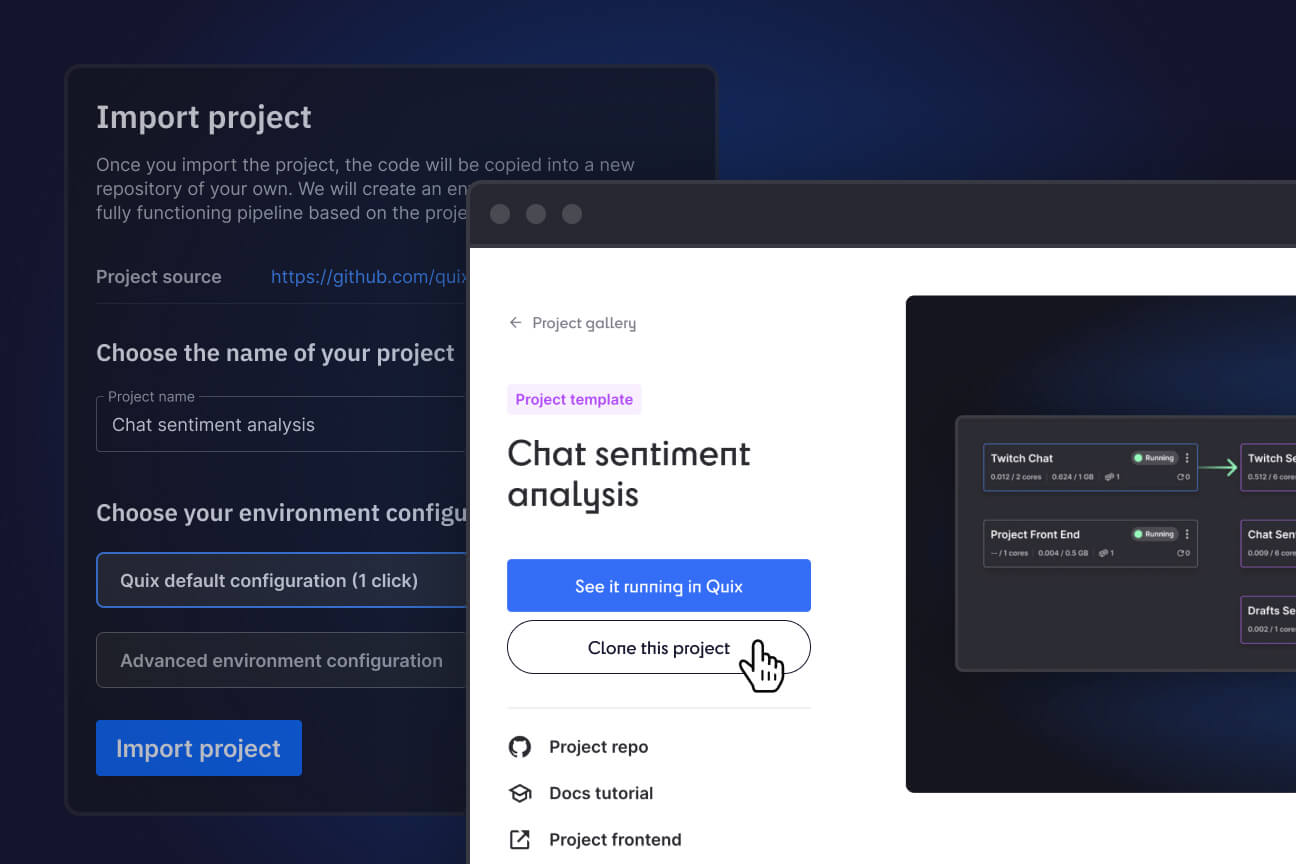
The quickest way to is to use the clone option on the project template overview page.
- Open the template gallery, select the project template that you’d like to use, and click the Clone this project button.

- To continue setting up the project, follow the relevant docs tutorial which is also linked to in the left-hand navigation
Note that this method wil automatically create a a clone of the Git repository in Gitea — a hosted Git serice. If you’d prefer to use GitHub, you’ll need to fork the project yourself.
Learn more about setting up project templates
If you want to use GitHub or simply get more details on how the cloning process works, read on.
Cloning a project template into GitHub
Before you clone a project template into GitHub, you’ll need the following credentials:
- an existing GitHub account.
- a free Quix account — if you haven’t created one yet, you can sign up now (you can do it in a few clicks with an existing Google, GitHub or Microsoft account).
- (optional) credentials for any partner technologies that the project uses (just as Redis Cloud or Influx DB Cloud, ect…). You can find a list of technologies used on the details page for the relevant template.
To get your own copy of the project and link it to a GtHub repo, follow these major steps:
Forking the repository
To get a handle on the code, you’ll meed to fork the relevant template repository. Why fork rather than clone? Because, later you’ll be bringing that code into your own Quix environment and using a fork is the easiest way to keep your environment synchronized. You’ll also be able to get any upstream changes we make to the project template.
If you already have a GitHub account with lots of repos, you might want to create a specific Git user for this project. Later you’ll be giving Quix SSH access to the repository and having a separate user is a good way to ensure that Quix does not have more access than it should.
Creating a new development environment in Quix
Before you can create an environment in Quix, you first need to create a project. During the project creation wizard, you’ll then be asked to add an initial environment. You can add more environments later once you get the hang of things.
To create a project and connect an environment to your forked repo, follow these steps:
- Open Quix and create a new project.
If you have an existing Quix account, log in and click + New project.

If you don't have a Quix account yet, create an account and, when prompted, choose the Advanced 5-click project creation wizard.
- When prompted for a project name, enter a descriptive name and select Connect to your own Git repo.
- On the next screen, you should see some instructions on how to add the Quix SSH key to your repo—follow those instructions.
Adding this key enables Quix to automatically synchronize your repo with the Quix environment.
The following screenshots show an example for predictive maintenance template
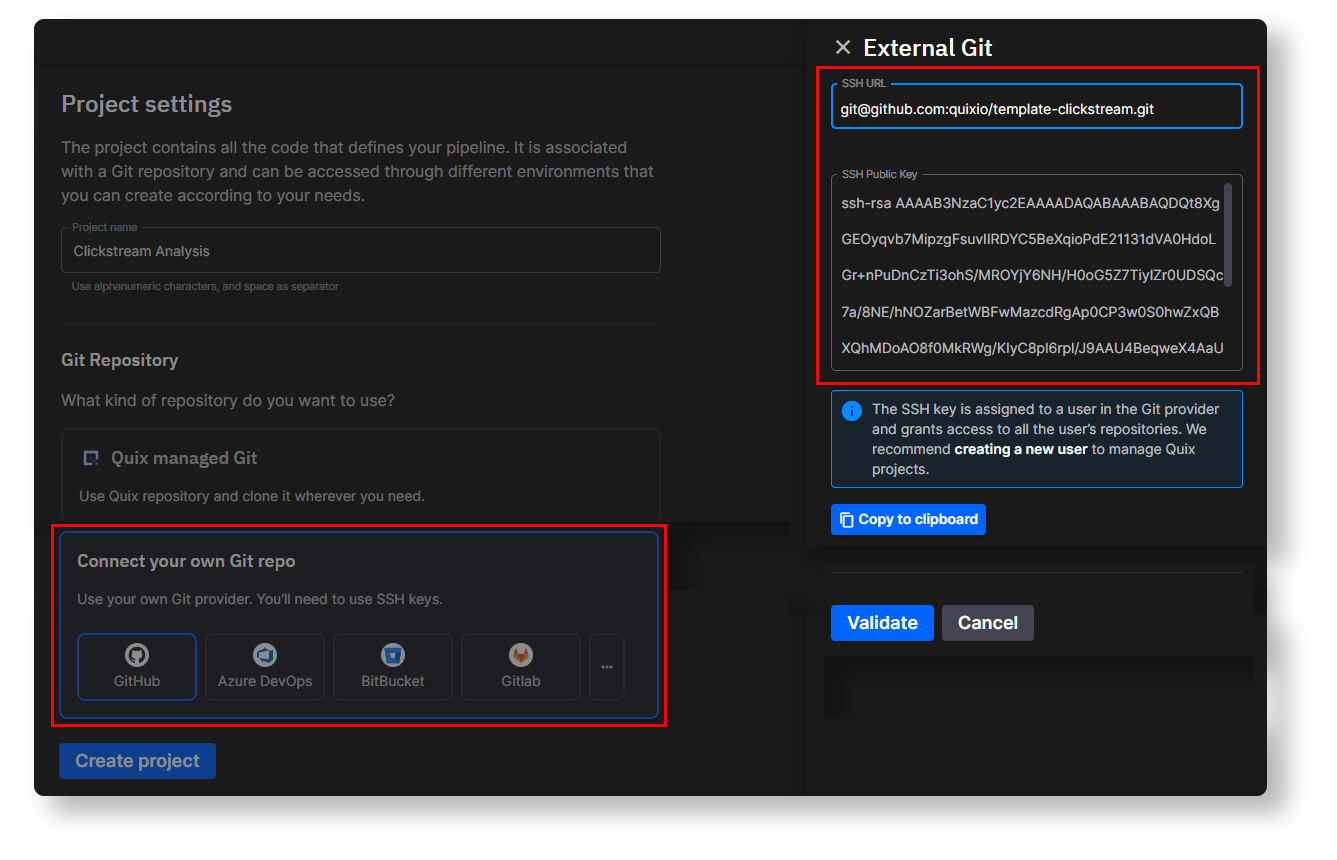
- On the next screen, you’ll be asked to create an environment—environments enable you to deploy code from different branches in parallel.
Enter ‘tutorial’ for the environment name and select the ‘tutorial‘ branch from your forked repo.
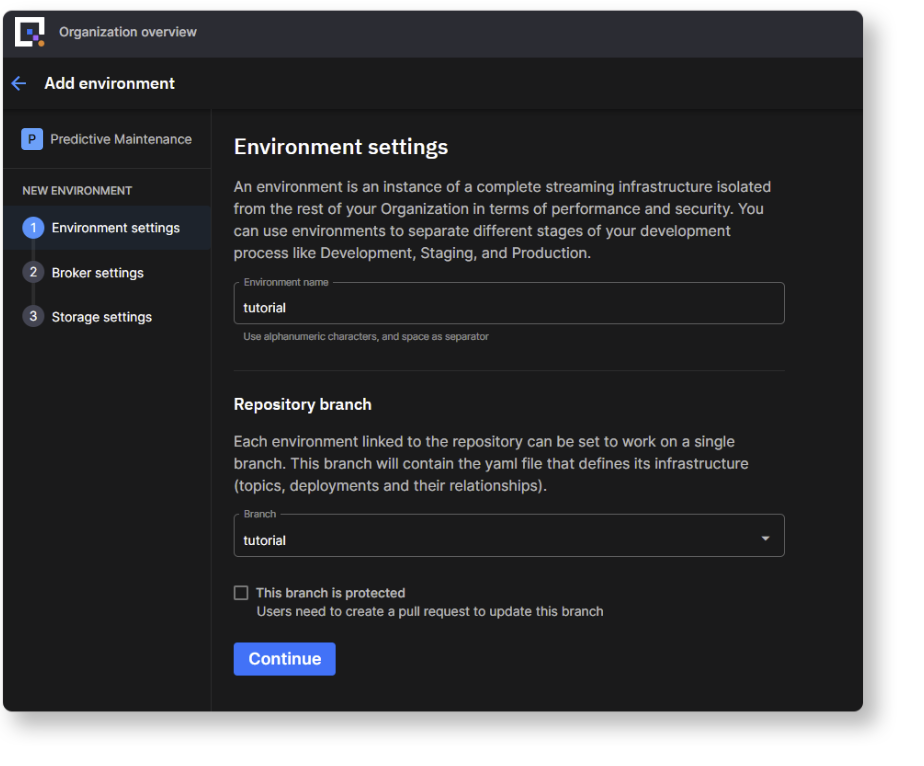
If you want to use this repo in production it’s advisable to set the branch as protected so that others don’t commit directly to the main branch and are required to use standard Git review procedures.
- Continue through the next steps in the project creation wizard.
- The wizard will ask you which message broker you want to use.
If you just want to get started quickly, you can just stick with the default Quix managed broker.
However, many of our template demos showcase connections external cloud-based message brokers such as Aiven for Apache Kafka or Redpanda. You can also use one of these if you want to copy the templates exactly.
- If you want to use an external broker, you’ll need to have the relevant credentials to hand—in which case you would select an option in the the Connect your broker provider panel and enter your credentials.
- Otherwise, the Quix managed broker is selected by default so you can just click Continue.
The following example shows the connection settings for Aiven for Apache Kafka.

- Continue through the next steps in the project creation wizard and keep the default storage settings.
- If it’s not open already, navigate to the Pipeline page.
You'll see a warning that your Quix environment is out of sync with the source repository (since the environment starts empty).

At this stage you might see the deployment names show up with dotted borders around them, indicating that the deployments have been configured but not yet provisioned.
- Click the Sync environment button to pull the latest code from your forked GitHub repo and provision the deployments
Note, the sync process is bidirectional: if you commit and push some changes to your repo from your local machine, Quix will automatically pull those changes. And likewise, if you commit some changes within the Quix IDE, it automatically will push those changes back to your GitHub repo too.
- You might be asked to add values for missing YAML variables or application secrets that are pre configured in the template. If you aren't sure what to enter, you add placeholder values for now—you can always update those values once you know the correct credentials and configuration parameters.
Hopefully the sync was successful. If it worked, you should see all your deployments get provisioned on the Pipeline page.
The deployment panels should now have solid borders rather than dotted borders. The services that require external credentials don’t start automatically though. You need to start them manually after you add the required application credentials.
For example, if a service connects to InfluxDB Cloud, it will fail if you try to start it before you’ve configured your InfluxDB Cloud credentials—but don’t worry, we’ll get to that in a minute.
Looking under the hood
When you open the Pipeline page in Quix, you’ll see a visualization of how the different back end services are interconnected.
Again, here’s an example from the predictive maintenance template:

Each service writes to a topic which the next service then reads from. The topics are thus the “glue” that connects the services together and are represented as lines leading from one service to the next. If you mouse over a line, you’ll see the name of the connecting topic provided as a tooltip.
Customizing the project
The first step to customizing the project is adding your any required app secrets. Not all templates connect to external services but many do. Also if template uses a front end written in a language other than Python, it needs a bearerToken to interact with the Quix API. As mentioned previously, you can check on a template's details page to see if it uses external technologies or a front end that uses a Javascript or Typescript framework such as Angular.
Adding the required secrets
Let’s look at an example of how you would add a bearer token for an Angular-based front end application to use. Front end clients need to use one of the Quix APIs to pull data—but to get that data, they must first authenticate using a bearer token. In the follow example, you’ll create a Personal Access Token (PAT) that you can configure as the bearerToken.
Getting a personal access token
Here’s how you get a personal access token in Quix.
- Open your profile menu on the top-right, and select Personal Access Tokens.
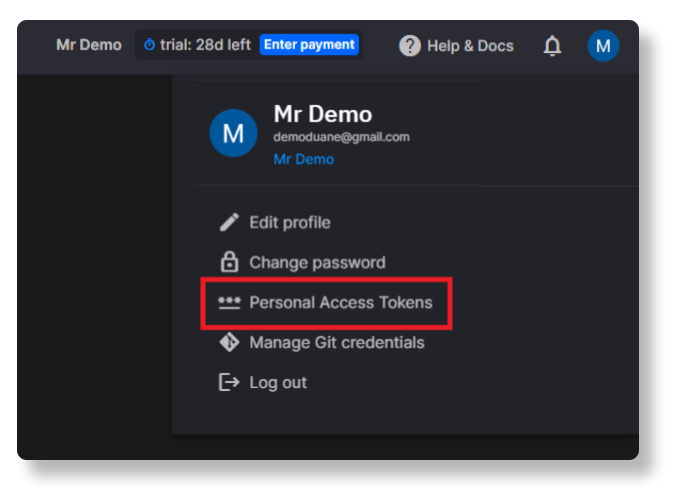
- In the dialog that appears, click Generate token, fill in the form, then copy and paste your personal access token to notepad or any other temporary storage location—you’ll need it for the next step.
Configuring the bearerToken as an application secret
You can now enter the PAT as a value for a new app secret called ‘bearerToken’.
The following example shows how you would add ‘bearerToken’ for the predictive maintenance template.
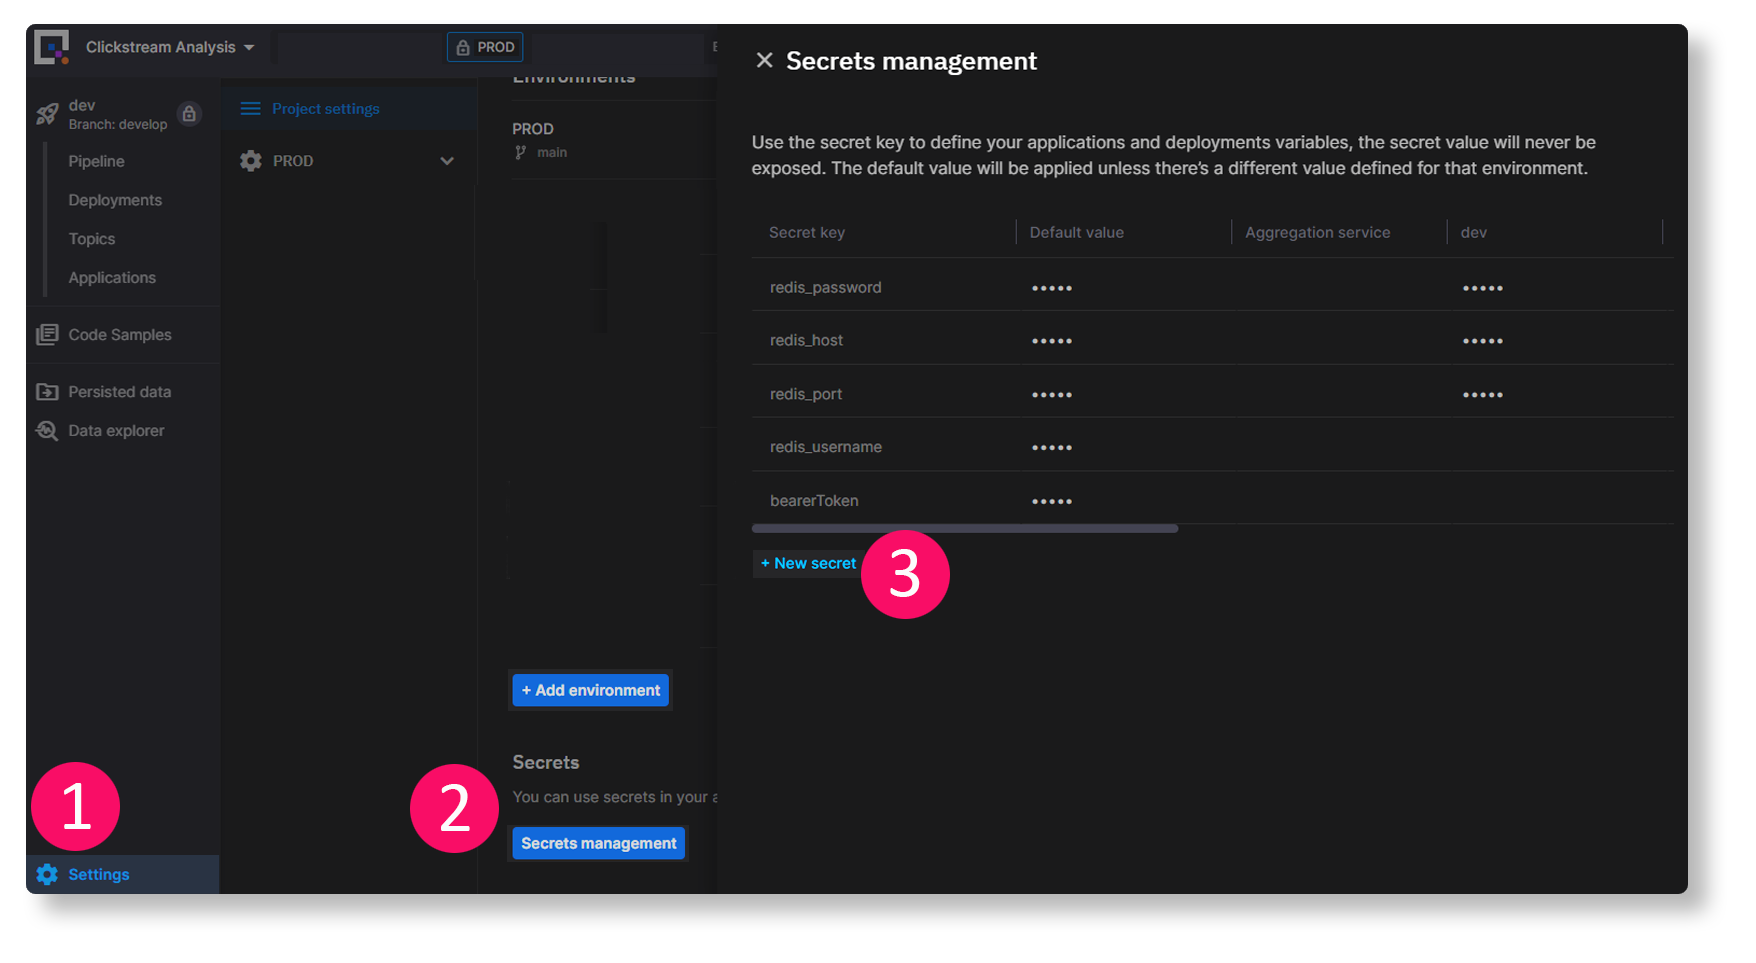
To add an app secret, follow these steps:
- Click the Settings button [1], then click Secrets management [2].
- In the panel that appears, click + New secret [3], and enter “bearerToken” as the Secret key.
- In the “Default” and “Tutorial” columns, paste your personal access token that you created in the previous step as the value in each cell.
Adding app secrets to store credetials for other partner technologies
Checking the project front end
You can tell which services include a front end by looking for a blue launch icon. This indicates that the service has a port exposed for public access.The following example is from predictive maintenance project.

Click the blue launch icon to open the relevant front end in your web browser.
And thats it! You have now copied a Quix project template. Hopefully everything went to plan. If you ran into any issues, feel free to ask a question in the Quix community Slack and one of the team will get back to you as asoon as possible.
- To learn more Quix Streams, check out the relevant section in the Quix documentation.
- To start working with project templates, check out our template gallery.
Check out the repo
Our Python client library is open source, and brings DataFrames and the Python ecosystem to stream processing.
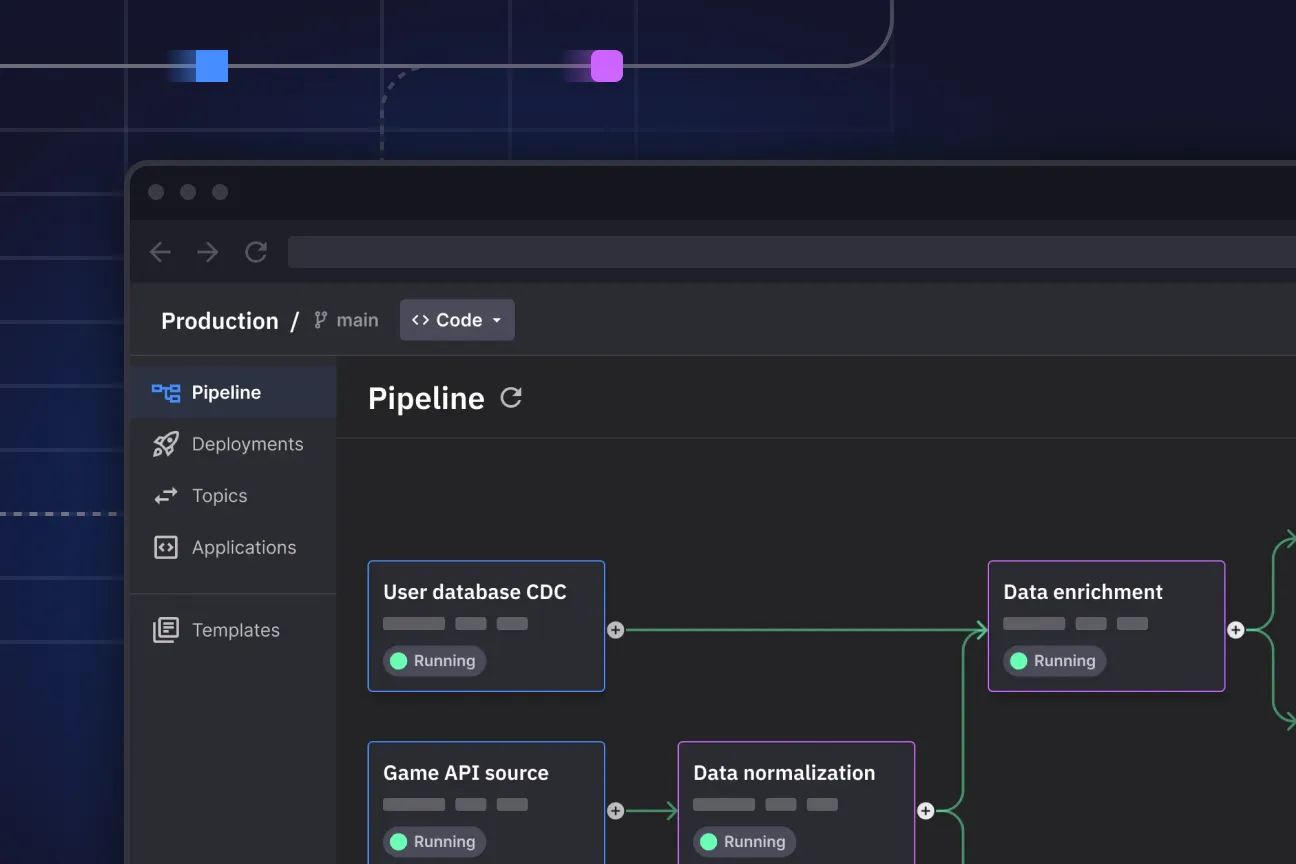
Interested in Quix Cloud?
Take a look around and explore the features of our platform.
Interested in Quix Cloud?
Take a look around and explore the features of our platform.

.svg)


 .
. ) in the service panel